TIPS .... Some things I have learnt along the way including mistakes !
In this section I will share some photographic tips that I have learned - usually the hard way!
EQUIPMENT
The best equipment you can have is a good "eye" for a photograph. Sometimes this comes naturally for a few people but it is something that is usually learnt. A beginner may struggle to take a good photograph even with an expensive camera, while a professional photographer can easily take a great photo with a cheap camera. This "intuition" comes with experience and knowing instinctively what will work and what will not. Read up on things like the Rule of Thirds, Leading Lines, Patterns, Framing, Depth of Field, etc. and read some good photographic books such as Tom Ang's How To Photograph Absolutely Everything or Michael Freeman's Mastering Digital Photography or The Kodak Guide to Digital Photography by Rob Sheppard. Look at works by great photographers in magazines such a National Geographic or websites on your favourite subject and try to see what they have done in the photo to make it great. Where is the main subject in the frame? What is the light like? Where is the horizon? Where is your eye drawn to in the frame?
When you then go to take a photograph, take your time, compose the shot in your mind, then in the viewfinder and then press the button. All too often I see people come up to a beautiful viewpoint, click the shutter once and drive off. Well they may have a record of the view but they will be lucky to have a great photo. The great thing about digital is that you don't have to worry about a finite length of film roll. You could take one hundred shots of a subject and still have room to spare on a memory card. Check the display for each shot and take several shots, adjusting your viewpoint from time to time. Remember to check for distracting objects in the background like people or parked cars or branches or wires. That way you will improve your chances of getting a good photo. Delete "bad" photos later when you are editing them. I have recovered some poorly exposed or framed photos by cropping and editing them.
I will deal with "technical" equipment next.
BUYING EQUIPMENT
I tend to buy my equipment used on ebay because funds are limited. However, I do research what I want thoroughly on the internet using equipment reviews before I buy and always pick a sale where returns are accepted. One word of caution from experience:- Buy Cheap, Buy Twice ! Always buy the very best equipment. If you can't afford it, save up until you can. Cheap equipment is unreliable, breaks easily and will let you down just when you need it most. Also, you are better off investing your hard earned cash into lenses rather than camera. Cameras are updated annually, there is always a camera with new features. If you are an amateur, you probably won't use half of these features and so waste your money. Also more megapixels does not guarantee good quality of image, it is sensor size and resolution that dictates image quality. If you only publish your photos to the web or only print to a maximum of 8x10 then megapixels are not vital. A good lens will greatly improve your chances of getting a good photo.
I tend to buy my equipment used on ebay because funds are limited. However, I do research what I want thoroughly on the internet using equipment reviews before I buy and always pick a sale where returns are accepted. One word of caution from experience:- Buy Cheap, Buy Twice ! Always buy the very best equipment. If you can't afford it, save up until you can. Cheap equipment is unreliable, breaks easily and will let you down just when you need it most. Also, you are better off investing your hard earned cash into lenses rather than camera. Cameras are updated annually, there is always a camera with new features. If you are an amateur, you probably won't use half of these features and so waste your money. Also more megapixels does not guarantee good quality of image, it is sensor size and resolution that dictates image quality. If you only publish your photos to the web or only print to a maximum of 8x10 then megapixels are not vital. A good lens will greatly improve your chances of getting a good photo.
CAMERA
What sort of camera you buy depends upon what sort of photography you want to take. If you just want general "snaps" of friends and family and events then a zoom compact is probably all that you will need. One step up from this is a Bridge Camera which is similar in size to a Digital Single Lens Reflex (DSLR) but costing less and having a large zoom lens built in to the camera. While cheaper, image quality is not as good as a DSLR.
A DSLR has a versatile interchangeable lens range from macro to super-telephoto but comes at extra cost. If you want to invest in this system on a limited budget, then buy used but always buy the best that you can afford. You cannot go too far wrong with a Nikon or Canon DSLR because of build quality, image quality, range of lenses and lens compatibility - every lens built since 1977 will work on my Nikon, albeit some in only in manual mode. In the end you normally get what you pay for, so check specifications carefully.
Professional cameras are built for rugged use and their lenses cost a fortune which is why there are lens hire companies. Professional DSLRs also have a larger camera sensor for better image quality, but lenses designed for APS-C (DX or "cropped") sensors will not function properly on full-frame (FX) cameras and will result in vignetting. Lenses designed for full-frame cameras will work on APS-C (DX) cameras although the camera will give you a 1.5x magnification (crop) factor, so a 300mm FX lens effectively becomes a 450mm lens on a DX camera.
For specialist use such as landscape photography medium or large format cameras are often used, so don't think that you can turn out pictures like a professional with a zoom compact. A zoom compact picture may look ok on a 6x4 print but wont stand up to scrutiny on A3 size.
If you are a beginner, always buy a camera with a wide range of controls even if you don't use them initially you will want to get away from auto-mode as you gain more experience. Here are some of the common control settings:-
AUTO - The camera does everything for you in terms of shutter and aperture settings. You simply point and shoot.
PROGRAM - The camera evaluates the subject in the sensor and compares it with a range of internal settings and chooses the one it thinks is best. This may not give the result that you intended.
S or Tv - This is Shutter Priority. You select the shutter speed that you want, e.g. fast for sports or slow for interior light and the camera works out the aperture setting.
A - This is Aperture Priority. I tend to use this a lot. This controls the size of the "hole" that the shutter diaphragm makes which controls both the amount of light that falls on the sensor and also the "depth of field" (the range of the photo that is in focus from front to back). This is very useful in obtaining a subject that is isolated from a blurred background.
M - This is full Manual Control. You are responsible for setting all aspects of exposure for the camera.
MACRO - If you like to take pictures of flowers or butterflies or jewellery, etc. then make sure that your camera has a Macro setting (the flower symbol on controls). It allows the camera to focus at a distance closer than normal focus.
SPORTS - Usually a running figure symbol. If you want to photograph playing children or sports events then this mode sets a fast shutter speed to freeze the action and reduce blur.
LANDSCAPE - This setting is symbol of a mountain and sets a small aperture which in turn provides a very large depth of field thus maximizing sharpness from front to back in the photograph.
ISO - This is the equivalent of the old film speed and determines how sensitive the sensor is to the light falling on it. Unfortunately the higher the ISO the greater the amount of noise (usually unwanted graininess) that will appear in the photo. However is is useful as a high ISO will allow you to capture a photograph in low light without flash. Ideal within museums, art galleries and churches or on safari at dawn or dusk.
FLASH - Virtually every camera has a built in flash. For the most part it gives horrible harsh results. Buy a camera with a hot-shoe on top of the viewfinder that will accept an external flashgun. This will allow the flash to be more controlled, bounced from ceilings or walls and even detached from the camera altogether. More on this later...
LCD / VIEWFINDER - Many cameras only have a LCD screen while some have both a screen and a conventional viewfinder. The LCD is great except in bright sunlight where it becomes difficult if not impossible to see an image. Some LCD screen tilt which does help and also makes taking shots when you are in a crowd or low to the ground much easier. With a viewfinder you have no problems with bright light but it makes life difficult to take photos when the camera is low the the ground. I prefer a viewfinder for the majority of my shots. If you also have a LCD screen use it to check every shot for sharpness and composition. Obviously the larger the LCD, the easier it is to check your results although results can normally be magnified using menu buttons.
JPEG & RAW FILES
Your camera can capture two types of file. RAW is where the image captured at the camera is not digitally compressed (or not compressed very much) while JPEG files are compressed to save size. However, compression also means that shadow or highlight detail may be lost in compression. Shooting in RAW allows the photographer far more adjustment of the image in post-production using editing software like Photodhop or Lightroom, etc.
BUYING
Go look at a camera type before you buy it if possible. Make sure that it is comfortable in your hand and the controls are well placed without you accidentally hitting the odd button. Make sure you are happy with features such as the lens zoom control and LCD screen or viewfinder. Try it out both in normal "landscape" mode and in vertical "portrait" mode. Whatever camera you purchase, read the instructions and understand what the controls and menu system do and practice lots until the controls are second nature to you. This means when an opportunity arises, you are not struggling to remember what is the best setting to use. For example, I didn't realise until recently that I could move the autofocus point in my camera by using the multi-point button.
LEARNING
Try to get away from using Auto or Program mode as soon as you can as you will learn more about photography this way. With old film cameras you had to use up a roll of film and wait for it to be developed then remember what settings you used, expensive and time consuming. Nowadays you can take a photo at a particular setting and see the result instantly at no extra cost. So start experimenting with the settings, start by seeing how changing the shutter speed affects a photo, the aperture values (f-stops). Starting at f22, each reduction in f-value decreases the amount of light by half, while each reduction in shutter speed increases the amount of light by half. Therefore 1/100sec at f11 will let in the same amount of light as 1/50sec at f16 and so on.
For information, I chose a Nikon because I bought a pair of Nikon binoculars and was very impressed by them. I had always wanted a Nikon film camera but could never afford one. I bought the D80 which is a great camera but I didn't like the small LCD screen so I bought a D90 and was very pleased with it. Nowadays I have migrated up to a full-frame camera the D3.
KEEP IT STEADY
Have you noticed that many professionals use a tripod while most amateurs don't? Professionals need their images to be razor sharp and a good tripod will keep their camera rock steady. You don't always need a tripod of course but if you want to shoot portraits, still life, macro or landscapes then a tripod is essential. Make sure the one you buy is substantial enough to resist being blown about in a still breeze while being light enough to carry around for a day. Many new tripods come in carbon fibre versions that are lighter but much more expensive than the aluminium allow equivalents. Pick a tripod that is flexible enough for your needs - mine (a Gitzo Mountaineer) can be positioned in virtually any angle from ground level to over six foot in height because I do landscapes, nature and macro.
When you buy a tripod, you will also need a head - the bit that holds the camera. There many different types but a good ball head is very flexible and when combined with a quick-release plate system such as Swiss-Arca type will allow quick and easy detachment of camera from tripod for maximum flexibility. Again buy the best tripod and head that you can afford. ALook on it as an investment - you will only waste money if you buy cheap and end up having to buy again.
LENSES
The lens is a critical part of the photographic process. Without a good lens an image may be unsharp or be distorted or have jagged contrast edges or purple fringing. The good news is that the lenses from major brands are generally good. The main problem comes with zoom lenses which are trying to be a jack of all trades but end up being master of none. Zoom lenses are a compromise to save you carrying a variety of fixed focal length lenses but image quality will vary across the zoom range from wide angle (eg 28mm) to telephoto (eg 300mm). The smaller the zoom range usually the less the image will suffer. Lenses are broadly divided into two types, fixed focal length lenses (Prime lenses) such as "standard" 50mm lens and Zoom (or Telephoto) lenses which have variable focal lengths such as 28-200mm. Lenses are also classified as Wide Angle (broadly less than 50mm focal length), Mid Range (broadly 50-85mm) and Telephoto (from 100mm upwards). Wide angle lenses as the name implies give a wide angle of view and are used mainly for landscape or architectural photography where there is a requirement to capture as much of a scene as possible. Standard lenses tend to provide a "normal" perspective and telephoto lenses are used to make a subject larger in the frame and are ideal for sports or wildlife photography. A good zoom lens will satisfy the majority of amateur photographer's needs but you will need to supplement this with a more specialist lens if you tend to photograph a particular subject. For example an 85mm Prime lens is considered to be the ideal lens for portraiture.
A common feature on autofocus lenses and cameras is a feature to reduce camera shake. The name of this varies between manufacturers, Nikon call it VR, with Sigma it is OS and with Canon it is IS. Regardless of name, it internally predicts movement of the lens/camera and changes focus to compensate. It is extremely useful, particularly with telephoto or zoom lenses and can allow you to take a photo handheld that would be blurred with a normal equivalent lens. One point - if you use a tripod then it should normally be switched off as it will compensate where no compensation is required since the camera is quite still.
If you can, bring your camera into a camera shop and try out any lens you are interested in buying then check out the results when you get home before committing a purchase. Also check internet reviews for their verdicts or search on photo websites such as Flickr for examples of taken with a particular lens or camera to get an idea of results. Finally don't be afraid to buy used, all of my lenses are used and are fine, and if you are anxious only buy where returns are accepted.
I use a variety of lenses, Nikon VR zooms (excellent), Sigma zooms (very good) and a cheap Samyang 800 mirror (ok) for really long range shots. Tamrom lenses are good but noisy when focussing and I have no experience of Tokina or any others.
About "fast" lenses
"Fast" lenses are ones with a very large aperture, e.g. f1.8 or f1.4 to enable the camera sensor to capture a large amount of light for any given shutter speed. These lenses are more expensive than normal "slower" lenses because they need a large front element to capture that light but still polished and built to very fine tolerances, thus are somewhat more expensive to make. Of course they also sell fewer and that increases the price. "Fast" lenses are used in low light conditions where use of flash would not give the result required. They also provide good contrast in extremely bright light. Low light conditions could be night or indoors, e.g. aquariums or reptile hoses or music venues, but also include times when you go out on safari or taking landscapes; i.e. dawn and dusk. Are they worth the extra money? - well only you can answer that. If you were a professional, then obtaining that great shot in low light will probably justify the expense. For the rest of us, we either lose the shot or try to adjust our results via photo editing software. I have a couple of "prime" "fast" lenses that I use for landscapes and they do give great results.
THE IMPORTANCE OF LIGHT
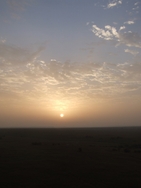
Photography is painting with light, but the quality of light varies enormously during the day, according to your location and weather conditions. The clearest warmest light is early morning and this is when major landscape photographers take their shots. Why? Because the air is calmer, dust particles have settled during the night and the morning sun provides a nice warm red light. As the day progresses, the air gets stirred with wind and dust particles get stirred into the atmosphere producing haze. Shadows harshen in direct sunlight unless clouds soften the light and the shadows. At sunset the light becomes warmer but you can still photograph when the sun has set and through into the night, especially in cities with a wealth of lights. In the old days you were taught to photograph with the sun behind your shoulder but this tends to produce portraits where the eyes are squinting and deeply in shadow. Worse still the person is dark and the background is either correct or overexposed. To reduce these effects, meter for your subject, lock the exposure (see your camera instructions) and then recompose. You can also use fill in flash - as most newspaper photographers and portrait photographers do or reflect some light onto the face using a bright surface such as a wall or a sheet of paper.
Light also means shadow and the best way too use this to your advantage is to use shadows to provide depth to three dimensional objects. Practice on something like an apple, orange, melon or ball in various lighting conditions to see the effect. Light and shade is also shown to best effect in photos of woods and trees, some lovely shots can be taken of sunlight streaming between trees.
Practice with your camera in all weather conditions and throughout the day and the year to understand the effects of light. More later when I address Exposure.
EXPOSURE
Exposure is simply letting the right amount of light into the camera to obtain the result you require. Note that I did not say "correct" result as you may deliberately want to overexpose or underexpose some or all of your photo for deliberate effect. Exposure is mainly controlled by your aperture (f-stop) which controls the size of the variable hole in the lens through which light enters and also by the duration that hole is open (shutter speed). Your choice of ISO will also determine the range of apertures and shutter speeds available to you.
Apertures are measured in f-stops e.g f4.5, f5.6, f8, f16, etc with the lowest number (e.g f4.5) being the widest size of hole and the largest number (e.g. f16) being the smallest hole. However, aperture also has an important function in that it controls "Depth of Field", that is the amount of the photo that is in focus from front to back. With a wide aperture, the Depth of Field can be as small as a few feet or less, while with a large aperture all of the photo will be sharp from foreground to background. This is why photographers use a wide aperture for portraits to isolate the person from the background, while landscape photographers tend to use the largest aperture available. The depth of field will also be affected by your choice of lens, a zoom or telephoto lens will very much reduce your depth of field. As to double the f-stop, e.g. from f8 to f16 then you half the amount of light entering the camera and it is important to remember this in conjunction with shutter speed.
Shutter Speeds are marked as fractions of a second, e.g. 1/30, 1/60, 1/100 etc. So 1/30 second lets in more light than 1/100 second. Like apertures, doubling the fraction lets in half the light so 1/30 second lets in twice the light of 1/60 second. Shutter speeds are useful in reducing blur caused by subject movement. Therefore fast shutter speeds of 1/1000 second are used in sports photography and some bird photography.
Combining aperture with shutter speed in Manual mode allows the photographer very fine control over exposure. If you cant get a fast shutter speed with the current aperture then increasing the aperture may allow you to get the faster shutter speed you require. For example 1/30 second at f16 gives the same exposure as 1/60 second at f8 thus allowing a faster shutter speed at the expense of a slightly reduced depth of field. Experiment and practice with manual mode until you are familiar with the effect of changing aperture and shutter speed, then you will know exactly what to do in poor or extreme light conditions.
The light meter inside your camera measures the average light in your viewfinder and sets the shutter speed or aperture accordingly except in Manual mode. However the meter can be fooled in extremely bright conditions such as snow or desert or very dark subjects. With bright subjects it will tend to underexpose giving muddy blue looking snow and it will overexpose with dark subjects. You can either switch to manual mode and adjust manually or use the exposure compensation dial on your camera to compensate by a selected f-stop increment (see your camera instructions).
FLASH
Most camera come with a built-in flash. If you can, don't use it unless necessary as it has a very short range (the Guide Number), is very direct and harsh and usually causes red-eye. If your camera has a hot-shoe (a flash mount just above the viewfinder) then buy a dedicated flash gun with a tilt-swivel head and as large a guide number as you can afford. This will allow you to use fill-in flash where the flash cuts out when enough light has fallen on the subject especially in sunlight and also allow you to bounce the flash off a white/cream ceiling or a wall to soften the light. The addition of a flash cable allows you to detach the flash gun from the camera altogether for great flexibility of light source.
There is a great chapter on Flash in the Kodak Guide to Digital Photography, so I advise you to look there or in other books I recommended above for further advice.
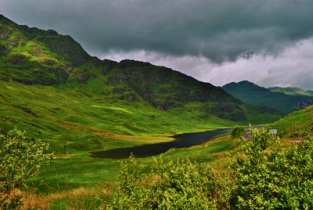
LANDSCAPES
The good thing about landscapes is that they don't move, although there is movement of clouds, trees and grass and water. You generally need a small aperture (f18 or f22) in order to get everything sharp from front to back, but rules are there to be broken and you may want only one particular area to be in focus and therefore open up the f-stop accordingly. Your choice of shutter speed will affect how sharp any moving object (like water) will be. To create a milky effect of rushing water or breaking waves you can use a slow shutter speed. The slower the shutter speed, the greater the effect.
Often there is too much difference in light value between the foreground and a bright sky. This can lead to a washed out sky or a very dark foreground. In this case a Graduated Filter can help. With the dark portion over the sky, the camera's meter will average out the reading for a better exposed photo.
Always try to use a tripod for landscapes and a shutter release cable, remote shutter release fob or use the self timer facility of the camera, the results are much sharper. If you are out early or late to photograph a location, dress for cold/wet weather including woollen gloves and bring a torch and mobile phone and let someone know where you are going. Also, leave nothing behind but your footsteps.
When composing, check what you want to be the main subject and place it in the viewfinder accordingly.
Try to get something in the foreground to provide depth to the picture. You should try to achieve a definite foreground, middle distance and background. Don't forget to check for unwanted items in the photo such as litter, cars or a twig. However, if you need a sense of scale then a figure, vehicle or tree placed in the foreground will help.
Leading lines such as a winding road, a straight road, trees, rocks or a wall can help give some interest to a shot and lead your eye towards another area in the frame. Similarly areas of light and shade can help create depth. Look for patterns such as fields, trees, rocks and animals, especially broken patterns with an odd colour or shape.
The choice of horizon line depends upon the area of interest. For example a dramatic sky with a generally uninteresting foreground such as a plain, will benefit a low horizon line. While an interesting foreground will benefit from a high horizon line. Generally only reflections such as a lake can get away with a central horizon.
Panoramas - Often landscapes are disappointing because the camera does not see that your brain takes in. You see a panorama while the camera sees a limited angle. You can now stitch several photos together either in camera or using stitching software, but try to make sure your camera is as level as possible, don't change the zoom setting and overlap each picture by about 20% or so. Beware of getting a tree right in the centre of the stitched result ! Panoramas work best with a low profile foreground.
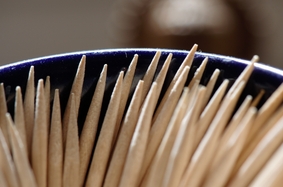
CLOSE-UPS
This topic includes flowers, jewellery, insects or scale models. If your camera has a Macro facility (the Flower symbol) then you can use this but a specialist Macro Lens will provide better results. I use a Nikon 85mm Macro lens , which is also useful for portraits. Focus and lighting is critical for close up work. Use a tripod to keep the camera steady and use a shutter release cable or self timer as any camera shake will be hugely magnified in close-up work. You can use autofocus with a wide aperture (e.g. f5.6) but switching to manual focus will probably give better results. Unfortunately getting close to a subject can also block the light. You can use a piece of white paper to reflect light onto the subject or even use a torch but flash usually gives a light that is too bright and harsh. For insects, focus upon a favourite flower and just wait for an insect to land there rather than trying to follow an insect around. Spider's webs are best photographed after some rain, as the water droplets hang on the web. Nearly all close-up subjects benefit from a dark background with no distractions, e.g. leaves for flowers or dark cloth for jewellery.
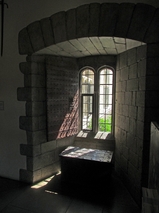
INTERIORS
If you have ever taken a photo indoors and got a yellow cast or greenish/blue cast on the photo it is because of the light source. Ordinary domestic tungsten bulbs give off a light wavelength towards the yellow end of the spectrum while neon is a cooler bluer light. With your camera set to daylight/sunshine/cloudy bright the cameras sensor doesn't adjust for the light source and thus produces a colour cast. Look at your cameras controls to see how to set for an artificial light source. All is not lost however, as photo editing software usually has a facility to reduce colour cast. If you are doing a still life then placing it close to a window should help but you may still have to adjust in-camera or in post processing.
Another problem with interiors is lack of light, e.g. churches. You may not always be allowed to use flash, so use a medium aperture (f8 or f11) and adjust up the ISO to 200 or even 400 to compensate for the lack of light. Check your LCD result and adjust accordingly by changing either ISO or shutter speed.
Your choice of lens will also dictate how much of an interior will be seen in the photo. To get the maximum interior of a building, you will need a wide angke lens of around 28mm or even wider. Be aware that the wider the lens, the more distorted the verticals will become until something like a 15mm fisheye lens gives a circular picture. If you can't get all of the interior in the frame, try a panorama shot (see Landscapes) or go for detail shots instead. Look for unusual decoration and detail in buildings such as stained glass, wood carving, doors or statues.
PEOPLE
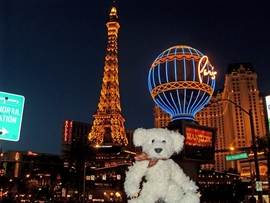
I will be honest here and state that I am not a very good people photographer. I hate posed photographs and try to shoot candid if I can. My wife and I have taken so many photographs of each other that we now bring a little teddy bear on our travels and have photographed him all over the world and have an album called "Teddy's Travels".
The basic rules of photography apply, composition, lighting and choice of lens but you also need to try to bring out something of the character of your subject, something that is not easily achieved in a posed photograph. For a portrait use either a zoom lens or a telephoto at somewhere between 85mm and 135mm focal length. This will allow you to fill the frame without poking a lens into your subject's face.
Try to capture something of their life by photographing them either at work or engaged in something like a hobby, sport or pastime. Engage in conversation with your subject as much as possible in order to relax them, explaining what you are doing and what you are trying to achieve. For children, get down to their level. It may help if you ask them to show you their favourite toy or describe something to you. For toddlers and babies, just be prepared to take lots of photographs and ask their parent(s) to keep them engaged.
Use a reflector or fill in flash to reduce shadows and to achieve a highlight in the eyes. Focus upon the eye closest to the camera (you may need manual focus to do this) and check your result immediately and re-take if necessary.
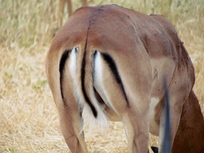
WILDLIFE
Wildlife is very difficult to capture. You need to be very patient and very quiet, something I am not and even then very much is left to chance as you may miss a fleeting moment. Although I love animals and the reward of getting a good photograph is tremendous, I get very frustrated trying to capture a good shot. If you are fortunate enough to go on safari, you are up against low light for a lot of the time as the best wildlife tours go out early morning or very late afternoon. Then the animals themselves do their own thing and don't pose for the camera. I have lots of shots of animals grazing but very few alert and head up. Luckily we have zoos, wildlife reserves and even parks and gardens closer to home, so photographing wildlife is within everyone's reach.
The best advice I can give here is to use a medium to long telephoto. You need to fill the frame with an animal as anything smaller than an elephant from 50 yards away with a standard lens looks tiny. Be quiet and patient (not me!) and try to wait for the right moment when an animal looks up or right at the camera. If your camera has "burst mode" (many frames per second) then use it to improve your chances. Make sure any camera "beep" noises are switched off via the menu.
In zoos there are lots of enclosures with wire mesh or railings which will spoil a shot. The reduce this, use a long telephoto or zoom with a wide aperture (around f5.6) and get the lens as close as possible to the barrier but taking account of your own safety regarding the animal or electric fence. This combination should make the fence blur out of focus while focussing on the animal. If you have problems, switch to manual focus.
With glass partitions, usually found in reptile houses or aquariums, switch from autofocus to manual, select a high ISO (maybe ISO 400) to prevent the flash from operating (in most cameras you can prevent the flash using a button), choose a wide aperture and place the lens tight against the glass. Don't wear anything bright that will reflect in the glass and be aware of other people nearby who will do the same. If you have a polarizing filter, try that to cut out reflections.
Fortunately all wildlife tend to be creatures of habit. They usually have a favourite spot or perch that they continually return to (if you have a cat, you will know what I mean). Exploit this by waiting for them to return to that spot rather than trying to follow them about too much. This is particularly true of birds. If you have a bird feeder, place a large twig in the ground or a pot close to the feeder, birds will tend to sit on one branch to look about for predators before feeding, so you can capture them there and it will look more natural than sitting on a bird feeder.
Please do not disturb and wildlife with young/eggs as they could abandon them. Be aware of laws and regulations regarding wildlife and respect them. If you can use a local park ranger, guide or naturalist to help you get the best photographs without endangering either the wildlife or yourself. Also, if you intend going out into the country to photograph either wildlife or nature, bring a companion if you can, make sure you have proper clothing, footwear, a mobile phone and water/food supplies and let someone know your exact planned location(s). Bring a map and compass for really wild locations.
ZOO PHOTOGRAPHY
I visited our local zoo (NEW - Dartmoor Zoo page) the other day, so I thought I would share some tips with you for zoo photography.
Camera
Any camera with some degree of user control will do provided it has a reasonably medium to long telephoto lens. I use a DSLR (Digital Single Lens Reflex) camera which gives full control over what I am trying to achieve. With this type of camera, I can also change lenses easily for specific purposes.
Lenses
In zoos, the animals tend to be reasonably close except for large paddocks for deer, zebras, etc. A zoom lens is ideal to cope with the variation in distance between yourself and the animal(s). A moderate telephoto lens of 70-200mm is adequate for most purposes. I used a single lens (28-200mm) the other day. A lens with a maximum of 300mm or even 400mm may be better depending upon distance.
Shooting Mode
I nearly always use Aperture Priority Mode (A - Mode) because zoo animals tend to be quite static. With an aperture of f7.1 I can isolate the animal from any surrounding background, to get a more "natural" looking photo. With caged birds I may increase the aperture to f5.6.
If the animal is fast moving, like a flying bird, i will switch to Shutter Priority (S-Mode or Tv-Mode) and set the shutter speed to at least 1/500sec to capture movement with minimum blur.
Wire & Glass
The major problem with zoos is the use of wire and glass, but you can eliminate this to a large extent by using a simple technique.
For wire, you need to use a focal length of at least 100mm or even longer. These lenses do not focus at close distances and so wire will appear blurred. Get as close to the wire as you can safely without endangering yourself or disturbing the animal. (Remember some fences are electrified!). Use a wide aperture such as f5.6 - f7.1 for a shallow depth of field. Focus upon the nearest eye. Take your shot and the wire should be totally blurred to be almost invisible. Post processing of shadow and contrast should improve the result. NOTE that the animal needs to be some distance away from the wire. You cannot blur the wire if the animal is close to it.
Sometimes the wire is too bright in strong sunlight and either confuses the autofocus or shows up clearly in the photo. In this case, try to find a piece of the wire in shadow or try switching to Manual Focus.
For glass, the main problems are reflections and confused autofocus. Put the lens tight against the glass to prevent reflections (clean the glass in that spot). Removing the lens hood will probably help, but be careful with the front element of your lens. If autofocus is confused by the glass, switch to manual focus. Use a polarizing filter to try to reduce reflections.
Low Light & Indoors
Some animals, like reptiles are kept in low light and also is heated rooms. DO NOT USE FLASH as it will reflect off the glass and will also disturb the animal. Instead press the lens gently against the glass,switch to Manual Focus and change the ISO (sensitivity to light) up from the standard 100 or 200 up to something like 2400 or even higher. A high ISO will allow you to take a fast shutter speed even in low light without having to use flash. REMEMBER to re-set the ISO when you go outside again. If you get noise (a speckled image) in you photos it can be reduced using noise reduction facilities or specialist software post processing.
When you enter a heated room, you lens will fog due to condensation (the difference in temperature causes water vapour to condense into water). Unfortunately, this will also happen on the camera sensor inside your camera that you cannot see. The solution is to patiently wait for a couple of minutes until the temperate of the camera raises to match room temperature. Repeat the wait when you go outside again.
Getting Better Photos
Zoo animals do two main things, eat and sleep. A sleeping animal doesn't make for a great photo, so you need to know when animals are generally active. Ask a keeper for advice if you can, but generally animals are active just before and during feeding times. Big cats are generally only fed once every two days. Find out the feeding times from zoo notice boards and turn up about 10 minutes prior to feeding. Animals are creatures of habit and know to the minute when they are supposed to be fed. They get restless and prowl up and down their compounds in anticipation, giving you good opportunities for a photo. Feeding time can also lead to fights over food, so be prepared.
I generally try to avoid zoos on holiday periods and busy summer weekends to avoid the crowds. It is often difficult to get a decent shot then you are tightly packed together at feeding time, so I go off-season, in dull weather and during the week. At these times, the keepers are generally more willing to spend time talking to you and giving you useful information about the animals.
Many zoos now have "toys" for the animals, usually brightly coloured that distract from a photo. Try to avoid having these in the photo and get some foliage in the photo to make the shot more "natural" Remember, you don't have to photograph all of an animal, sometimes a part of an animal like a face, an eye or paws and hoofs are just as effective.
Zoo Support
Most zoos undertake a lot of wildlife conservation work behind the scenes and you can help in various ways by taking out an annual membership (the cost is easily covered by four or five visits) or even sponsoring an animal.
If your zoo is a good zoo, tell as many people as you can about it. If your zoo is poor, complain about it to the zoo director and you local government.
I hope these tips help you get the best out of your next zoo visit. Good luck!
TRAVEL
Travel photography is a combination of all of the above. You want to be able to capture the essence of your trip and while this can include people, architecture, landscapes and wildlife, it can also be simple things like a plate of local food or a particular type of souvenir. Sometimes the detail can say more about your trip than the general. It is your trip, so make the photos personal and something to reflect upon later. Read up on where you want to visit before you go, so that you know where you should get good photographs. While not wanting to slavishly copy others, local postcards can be a guide to the best viewpoints or places of interest. Unfortunately travel usually means loads of tourists arriving at the same time, so try to get to places early or at the front of your group or else wait behind a little to get the shot you want. Remember to ask permission from local people to take their photo, and you may need to pay them a small amount so keep some loose change handy. Always show them the result and maybe you can get some more shots with better results having gained their confidence. Remember most of all to enjoy the trip and not let your photography dominate the experience.
Try to plan your trip according to local seasonal variations, remembering that some areas are subject to monsoons, hurricanes or typhoons, snow blizzards, high humidity or boiling heat at certain times of the year. Look at local weather averages before you book your trip. Also remember that you will need medical preparations for some countries. Finally, don't forget to ensure that your passport still has some months to run before expiry and you may need to arrange visas. Bring a photocopy of your passport personal details page just in case you lose your passport and need to visit your embassy, it will help speed things up. Have plenty of loose change available for tips and paying locals to take their picture.
You want to travel as light as possible, so bring a good zoom lens for maximum flexibility and a wide angle lens for landscapes and some interiors. While you might not bring a tripod, a bean bag or a rolled up jumper will help keep things steady. Brace your camera against walls or pillars or on top of wall as much as possible. Always keep an eye on your equipment and don't set your valuables/camera bag down to take a photo, get a fellow traveller to hold it for you. A label on your camera strap may help if you do leave it somewhere, but I wouldn't hold out too much hope!
After the trip you will probably have hundreds of photographs, so try to create a little album of the 50 photos that capture the essence of your experience rather than bore people with a three hour slideshow.
WHAT TO DO ON AN ORGANIZED TOUR
On an organized tour, whether it is a half-day city tour or two week vacation, time is limited, so you need to plan ahead.
1. Bring the right lens - if you are shooting architecture or interiors then pack a wide angle lens to obtain as wide a view as possible. If you haven't got a wide angle lens, then take several vertical format overlapping shots and then stitch them together later into a panorama. If your interest is wildlife then a wide angle lens is useless and you will need a zoom lens.
2. Do some homework - look at points of interest on the internet or postcards in a local shop to get an idea of where the best viewpoint is located. Take at least one shot from that point then vary your position. If you are shooting wildlife then you are very limited with where you can shoot from, so concentrate on composition.
3. Don't take photos from the coach - Unless the coach is driving relatively slowly and your camera is tight against the window, your photos will just turn out blurred or full of reflections. Simply enjoy the views with your eyes, it is less frustrating. If you are in a car or a taxi then ask the driver to stop safely where you see a good photo.
4. Use some imagination - Of course you will want to photograph what thousands of others have come to see, but use some imagination to change the viewpoint or composition to give a photo your own signature. For example, get lower or higher than other photographers. Put in some foreground interest or use leading lines or water/window reflections to achieve a different perspective.
5. Vary your photography - Use both portrait and landscape modes. Take photos of detail as well as the overall view. Take photos of local food, people, architecture, signs - anything that provides a flavour of the locality.
6. Ask the guide - Ask the guide if there are some special places where the tourists don't normally go, like a quiet plaza or local market. Normally these are just as interesting as the main point of interest, will have fewer tourists and will contain some local colour and characters.
WEATHER
We have all planned a trip and when we arrive the weather is not great, so what can you do? Well, if you are in a city you can always go indoors or to a zoo or botanic gardens and concentrate on some detail. Likewise you can do some street photography capturing local people, transport, architecture or shop/market displays. If it is raining try some unusual shots of people with umbrellas or reflections in puddles of buildings or lights.
If you are in a landscape then you may be able to cheat and add in an interesting sky using a photo editor (as I did with the Taj Mahal in the header). However, there is always some detail to photograph like a rock formation or rock layers, flowers or a tree, local birds, reptiles or insects. Even a dead branch or log on the ground can provide a good photo if you look hard enough.
Sometimes the weather itself if the point of interest. Dramatic skies make great photographs particularly just before or just after a storm. At the coast, breaking waves are a great subject. Rain, fog and mist are the real killers but you may still be able to get a good shot if there is enough light. Mist at a harbour or on a lake or pond will provide some atmosphere. With rain, focus on raindrops on leaves or a branch or a spiders web after a shower. Check your lens frequently for raindrops and clean them off. I have had several photos ruined because of a couple of raindrops on the lens. Remember the weather always changes so be prepared to wait and if you can't then maybe you can come back again with better weather. If you can't then just chalk it up to bad luck and move on.
COMPOSITION
Photography is more art than science, and so is very subjective. However there are some rules worth following and then breaking once you have mastered them.
Rule 1 - GET YOUR MAIN SUBJECT IN FOCUS. If it is a person, animal or bird then you should get the eyes in focus as this is where viewers will look.
Rule 2 - SHOOT GREAT SUBJECTS. A great subject is something different from normal. A photo of a book is normal and boring, while a photo of a charred book is different. There are thousands of "documentary" type photos that record a subject so your photo should has to be different to result in a "great" shot. Be imaginative in your subject and composition. This is where I fail miserably.
Rule 3. - KEEP IT SIMPLE. Complex, cluttered photos will distract the viewer from the main subject, so simplify form to basic graphic elements. Try to exclude distracting backgrounds.
Rule 4. - FOLLOW THE RULE OF THIRDS or THE GOLDEN MEAN. Artists have used these rules for hundreds of years with good reason - they result in a pleasing composition. They can be broken of course but only once you understand what you are doing.
Rule 5. - USE STRONG SHAPES. Strong geometric shapes and lines are bold and dramatic and catch the eye. Use them to your advantage when you can, e.g. the line or curve of a road, spirals in shells and stairs, frames for backgrounds such as arches.
Rule 6. - USE GOOD COLOUR. Complementary colours are great for photography. Examples are Cyan (Light Blue) and Red, Blue and Yellow, Green and Magenta (Pink). Also saturated colour is best achieved in overcast or shady conditions, bright light gives less saturation to colours.
Rule 7. - USE THE LIGHT. Don't always shoot with the sun over your shoulder. Shooting into the sun can produce dramatic effects and of course everyone loves sunrises and sunsets. Backlighting and silhouettes are also effective for good photos. Shoot early in the morning or late in the afternoon or twilight for the best light. Try to wait for the best light if you can.
Rule 8. - CHECK THE BACKGROUND. We have all been there - a beautiful landscape and there is an electricity pole somewhere in the background or a photo of a bird or animal with an annoying twig or bright flower in the shot. Before you press the shutter, check for anything that you don't want in the viewfinder.
Rule 9. - BREAK SOME RULES ! You don't always need to show the complete subject. Close-ups can be great too. A photo of a peacock feather or the face of an eagle can often be just as effective as a shot of the whole bird. Introduce some blur to add motion to a shot. Have a tilted subject. Don't be afraid to try things, some will work and others wont. You will learn more from mistakes.
Rule 10. - MOVE AROUND. Don't just look at something and take a photo. Remember to move around to check the best angle, light and composition while taking photographs. Moving around also means getting lower or higher. Sometimes getting lower produces a better landscape photo or a photo of children or pets. Looking down on a subject also produces a different perspective. Moving around changes the angle of light and of shadows.
ORGANIZING & EDITING
Once you load your photos onto your computer, I recommend that you burn then to a CD as a backup. Also using a portable disc drive as a backup is recommended, but even portable hard discs fail.
The software that is shipped with your camera or computer is normally adequate for cropping an image and adjusting contrast, brightness and colour but if you want to organize your photographs and do more advanced editing you will probably need more specialist software. I, like many millions of others settled on Adobe software but others are available. Adobe offers three major products, Photoshop Elements, Lightroom and Photoshop in ascending price order:-
Photoshop Elements is a cut down version of Photoshop but is very high on features suitable for most amateur photographers.
Lightroom contains slightly more features for advanced image manipulation.
Photoshop is really designed for graphic designers and professional photographers and is priced accordingly.
All of these products allow you to organize your photographs in terms of subject matter, user specified tags, albums and files. Thus, for example, you can rapidly search for all church photographs taken in Spain by a Nikon D90 camera. In addition advanced editing facilities allow you to pretty much manipulate an image as you would like. For example, adding a sunset, blurring a background, or making an image pop out of the photo frame.
Sometimes, 30 day free trials of editing software are available, so you can try before you buy. I am not going to recommend any particular software, but I found Adobe Elements sufficient for my needs despite some minor reservations about some features and intuitive use.
No matter what software you have, you should take time to learn how to crop an image to improve composition. Straighten a photograph so that the horizon is horizontal and be able to adjust basics like contrast, brightness, colour saturation and hue. For specific software buy a good book specifically about your software, or search the internet for help, tips and tricks.
COMMON PROBLEMS - And how to fix them !
BLURRED IMAGE
Caused either by movement of the camera when taking the photo or movement of the subject.
Keep your camera as steady as possible when taking a normal photo. Use a tripod or use any firm surface such as a wall or railing or lamppost to brace your camera to keep it steady. Carry a bean bag or use a rolled up jacket when travelling. For handheld, jam your elbows tight to your body, support the lens with your left hand and hold the viewfinder tight to your head, breathe out and "click".
When a subject is moving a slow shutter speed will cause the image to be blurred. Sometimes this can be used to achieve artistic effect but most of the time you need to move the camera (called Panning) to follow the subject and use a fast shutter speed to freeze the action. For some moving subjects you might be able to use flash to freeze the action.
PHOTO TOO BRIGHT WITH COLOURS "WASHED OUT" OR NO CONTRAST
This happens when too much light enters the camera and is called OVEREXPOSURE. Although cameras have built-in exposure meters, they can be fooled by extreme conditions. Check the image you have taken and if it is too bright, reduce the shutter speed (e.g from 1/100 sec to 1/250 sec) or make the aperture (f-stop) smaller (e.g. from f8 to f11) and re-take. You can also use Exposure Compensation (+/-) button to dial in less or greater expusure if it is fitted to your camera.
PHOTO TOO DARK
This is called UNDEREXPOSURE and is the opposite of UNDEREXPOSURE above. Simply decrease the shutter speed or increase the aperture or use Exposure Compensation.
COLOURED STREAKS OF SPOTS ON THE PHOTO
This is cause by shooting towards the sun. The lens internally reflects some sunlight causing bright streaks or spots. Use a lens hood if you have one or move around slightly if you can. Also shade the front of the lens with your hand, a cap or anything to hand like a paper or magazine but make sure it doesn't get into the edge of the photo!
SUBJECT NOT IN FOCUS (BUT BACKGROUND OR FOREGROUND IS IN FOCUS)
The autofocus has not focused on the subject. Most cameras automatically focus on the centre of the frame. If your subject is off to one side then the camera will focus on the foreground or background instead. You can get around this easily. Place the subject in the centre of the frame and press the shutter release button halfway down until the subject is in focus. Now, keep you finger where it is am move the camera until the subject is where you want it in the frame then press the shutter button down to take the photo. Some cameras will also allow you to move the autofocus points around the frame to suit off-centre subjects.
HARSH SHADOWS (Mainly in portraits)
A camera can only cope with a finite rage of difference between light and shade, much less than the human eye. Bright sunlight causes harsh shadows especially around the eyes, under the nose and under the chin in portraits. You can choose to shoot on the shade or wait for clouds to block the sun but you can also fill in the shadows. You can use flash but this is generally a bit too bright and produces an artificial light. Simply use a reflector. Any bright surface will do such as a sheet of white card/paper, a light umbrella or a light coloured wall nearby. You can also buy small foldable purpose-built reflectors that are silver on one side and gold on the other side for a warmer glow..
