We have all done it ..... The photo looked great in the viewfinder but when we look at it on the computer there is something just not right about the result. This is where cropping a photo (basically re-framing part of the image) comes into play. I will use one image to demonstrate how a photo can be cropped to give quite different results. How you crop is up to you as a photographer (you do it automatically when you take a photo) and as an editor (when you want to change the resulting image). You can simply change the format frame from landscape to portrait (or vice versa) or concentrate on some detailed part of the image to get a new image. It is not difficult and once you use cropping, it is an invaluable tool.
How to crop ?
All photo editing software allows you to crop a photo. Find the Crop tool within the software and you are usually presented with a menu of frame sizes such as 8x10 portrait, 8x10 landscape, 6x4, 5x7, etc. Simply choose the crop size you want and move the cursor to the image. A small rectangle should appear and then you can drag the corners in or out to decrease or increase the crop area. If you want to move the frame to a different area of the photo, simply click somewhere within the frame and drag the frame around the image to the desired spot.
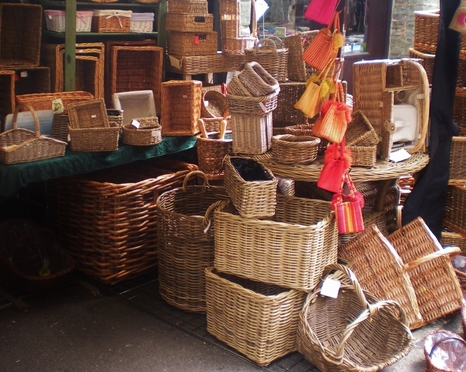
IMAGE AS TAKEN
This image is in Landscape Format (i.e. it is wider than it is tall). There is plenty of subject matter within it to allow it to be cropped in a variety of ways.
This image is in Landscape Format (i.e. it is wider than it is tall). There is plenty of subject matter within it to allow it to be cropped in a variety of ways.
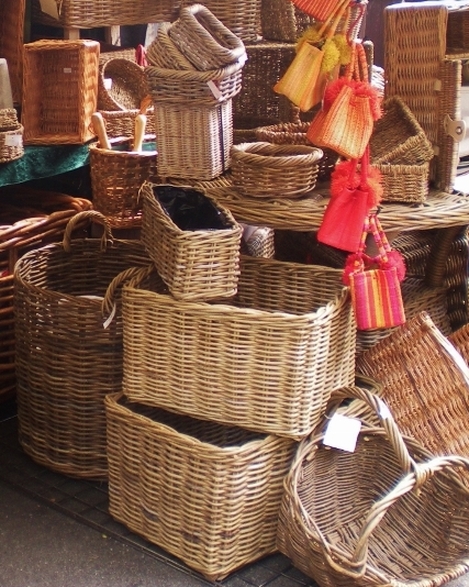
CROPPED TO PORTRAIT
Here I have cropped the right hand side of the photo and changed it to a portrait mode frame. The coloured bags are placed 2/3 of the way in to the photo as a visual barrier to stop the viewers eyes wandering out of the photo.
Here I have cropped the right hand side of the photo and changed it to a portrait mode frame. The coloured bags are placed 2/3 of the way in to the photo as a visual barrier to stop the viewers eyes wandering out of the photo.
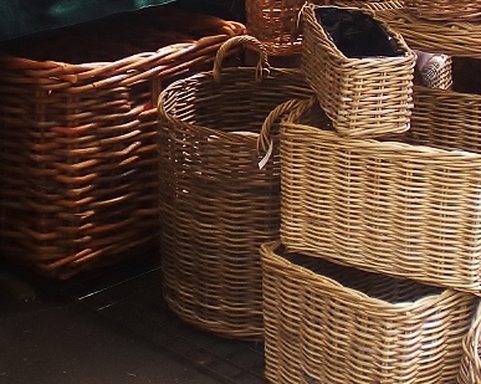
DETAIL CROP
Here I have cropped in on the left of the photo to concentrate on the detail of the baskets. Note that the more you crop in for detail, the more image quality decreases and you end up with less pixels to see.
Here I have cropped in on the left of the photo to concentrate on the detail of the baskets. Note that the more you crop in for detail, the more image quality decreases and you end up with less pixels to see.

ANOTHER DETAIL CROP
Another crop to provide detail. This time a more central area.
Another crop to provide detail. This time a more central area.
OK, so there you have it. A simple technique to improve your image composition. Very quick and easy and it can chan an ok photo into a good one.
 RSS Feed
